

Compare floor plans using one table, five criteria, and a scoring pass before you ever visit a model home. That's the short answer. Pull 2–5 plans you're seriously considering, then check these dimensions first:
- Circulation: Can you walk from the entry to the kitchen, bedrooms, and bathrooms without cutting through another room?
- Room dimensions: Do the actual numbers (not the drawing size) fit your furniture and your life?
- Orientation: Where does the north arrow point, and which rooms get morning vs. afternoon sun?
- Storage locations: Are closets, pantries, and mechanical spaces placed where you'll actually use them?
- Footprint vs. lot: Does the plan's width and depth fit your specific lot with room for setbacks and a driveway?
Save every plan and your notes to a single private account so nothing gets lost in email threads or browser tabs. A dedicated comparison workspace beats a folder of PDFs every time.
Key Takeaways
The most reliable way to compare floor plans is to populate a single scoring table with actual dimension strings, check circulation and orientation before anything else, and validate the shortlist with a physical mockup or model-home visit.
| Point | Details |
|---|---|
| Start with five criteria | Circulation, room dimensions, orientation, storage, and footprint fit matter more than total square footage. |
| Use actual dimension strings | Read the numbers printed on the plan, not the drawn size; U.S. plans typically use 1/4" = 1'-0" scale. |
| Score against must-haves | Award 2 points per must-have met, 1 per nice-to-have, and subtract 2 per red flag to rank plans objectively. |
| Validate with a mockup | Tape room footprints on the floor or place scaled furniture cutouts on the plan before committing. |
| Use Nestnoted for private comparisons | Nestnoted saves annotated plans, imports listing data, and lets you score and share comparisons privately. |
Table of Contents
- How do you compare floor plans side by side?
- How do you read a floor plan quickly?
- What's the best step-by-step method to compare 2–5 plans?
- Which tools let you run a floor plan comparison?
- What red flags should you watch for in a floor plan?
- How do you confirm a plan will feel right before you commit?
- Copyable comparison table template
- The habit that actually saves time and prevents regret
- Nestnoted keeps your floor plan comparisons private and organized
- Sources
How do you compare floor plans side by side?
Use these columns as your table headers. Copy them into a spreadsheet or a comparison tool and fill one row per plan.
| Column | What to look for |
|---|---|
| Total square footage | Conditioned space only; confirm whether garage is included |
| Bedrooms / bathrooms | Count and split (e.g., 4 bed / 2 bath); note en-suite vs. shared |
| Room-by-room dimensions | Actual dimension strings from the plan, not scaled estimates |
| Layout flow / circulation | Number of pass-through rooms; dead-end corridors |
| Kitchen layout & work triangle | Distance between sink, stove, and fridge; aisle width |
| Storage & mechanical | Closet count, pantry, utility room, HVAC location |
| Orientation & windows | Primary living spaces facing south or east for daylight |
| Footprint / lot fit | Width × depth vs. your lot minus setbacks |
| Garage placement | Front-load vs. side-load; impact on street presence and yard |
| Customization options | Semi-custom vs. fully custom; listed alternates |
| Modification cost / difficulty | Plumbing moves, load-bearing walls, roofline changes |
One column that buyers routinely skip: modification cost. A plan that scores well on everything else but requires relocating a bathroom to work for you is not a cheap fix. Flag it now, not after you've signed.
Pro Tip: Add a "deal-breaker" row at the bottom of your table. If any plan has a hard no in that row, it drops off the list regardless of its total score.
How do you read a floor plan quickly?
A floor plan is a top-down view cut roughly 4 feet above the floor, which is why you see countertops and window sills but not ceiling heights. Everything you need to evaluate a plan is already drawn in; you just need to know where to look.
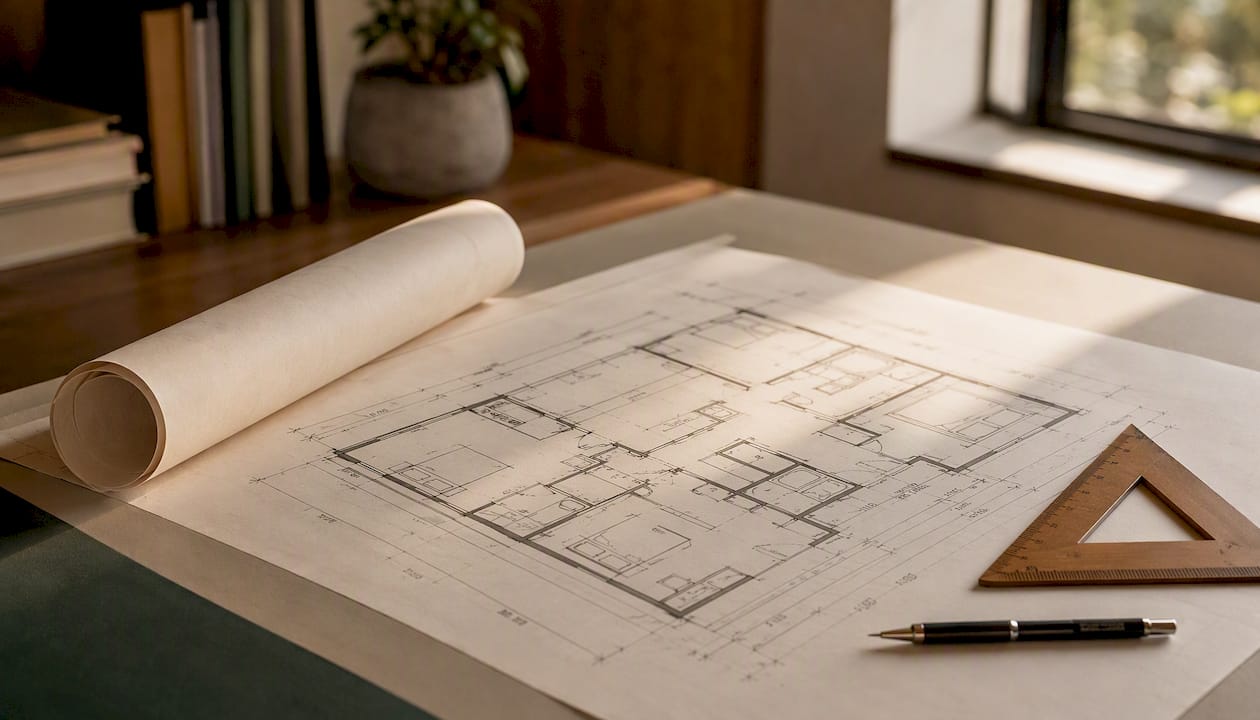
Start with scale. U.S. residential plans typically use 1/4" = 1'-0", meaning every quarter inch on paper equals one foot in real life. Read the dimension strings printed on the drawing, not the drawn size of the room. A room that looks large on a small printout may be 10' × 11' in reality.
Find the north arrow. It's usually in a corner of the sheet. Rotate the plan mentally so north points up, then ask: which rooms face south (best for passive solar and winter light), and which face west (afternoon heat in summer)? Primary living spaces and the kitchen ideally face south or east.
Read the wall conventions. Exterior walls are drawn thick (typically 6" in wood-frame construction); interior walls are thinner (3.5"). A very thick interior wall often hides plumbing or structural elements. Door swings are shown as arcs; a door that swings into a narrow hallway or conflicts with an adjacent door is a livability problem you can catch right here.
Check dimension chains. These are the strings of numbers along the exterior and interior of the plan. Add up a chain to confirm the overall footprint. If the numbers don't add up to the stated total, ask for a corrected set. Reading a plan confidently helps you spot missing structural or permit-related details before framing begins.
Quick clearance checks to run on every plan:
- Hallways: minimum 3'-0" clear (3'-6" is more comfortable)
- Kitchen aisles: minimum 3'-6" for single-cook, 4'-0" for two-cook
- Toilet clearance: recommended clearances in front and from centerline to side wall
These minimum clearances are standard red-flag benchmarks used by designers to catch livability problems early.
Pro Tip: If you're working from a PDF, drop it into Adobe Acrobat or a free tool like Smallpdf and use the measuring tool. Set the calibration by clicking a known dimension string, and every subsequent measurement will be accurate to scale.
What's the best step-by-step method to compare 2–5 plans?
A repeatable process matters because the plans you're comparing will blur together after the third one. Here's the order that works:
-
Shortlist 2–5 plans by hard constraints first. Budget, lot dimensions, and required bedroom count eliminate most candidates before you do any detailed work. Don't compare a 1,800 sq ft plan against a 3,200 sq ft plan unless both are genuinely on the table.
-
Gather high-resolution plans and confirm scale and north orientation. A blurry image or a plan with no north arrow is not ready to compare. Request the full plan set from the builder or designer; professional sets include architectural, structural, and mechanical drawings.
-
Populate your comparison table. Use the columns from Section 2. Fill every cell with actual numbers from the dimension strings, not impressions. Leave a cell blank rather than guess.
-
Run practical tests on paper. Trace the path from the front door to the master bedroom at 2 AM (no lights, no noise). Count how many rooms you pass through. Place standard furniture footprints: a queen bed is 5' × 6'8", a dining table for six is roughly 3' × 6'. If the bedroom can't fit the bed plus 24" clearance on three sides, note it.
-
Score each plan against your must-haves and nice-to-haves. Assign 2 points for a must-have met, 1 for a nice-to-have met, and -2 for a red flag. Total the scores. The highest score isn't automatically the winner, but it tells you where the trade-offs are.
-
Save annotated plans and export a printable comparison before any model-home visit. Walking into a model home with your comparison table in hand keeps the visit focused. You're there to validate specific questions, not to start the evaluation from scratch.
Experienced designers note that sightlines, furniture footprints, and room adjacencies predict livability better than raw square footage. The scoring step forces you to weight those factors explicitly.
Which tools let you run a floor plan comparison?
The right tool depends on how much depth you need.
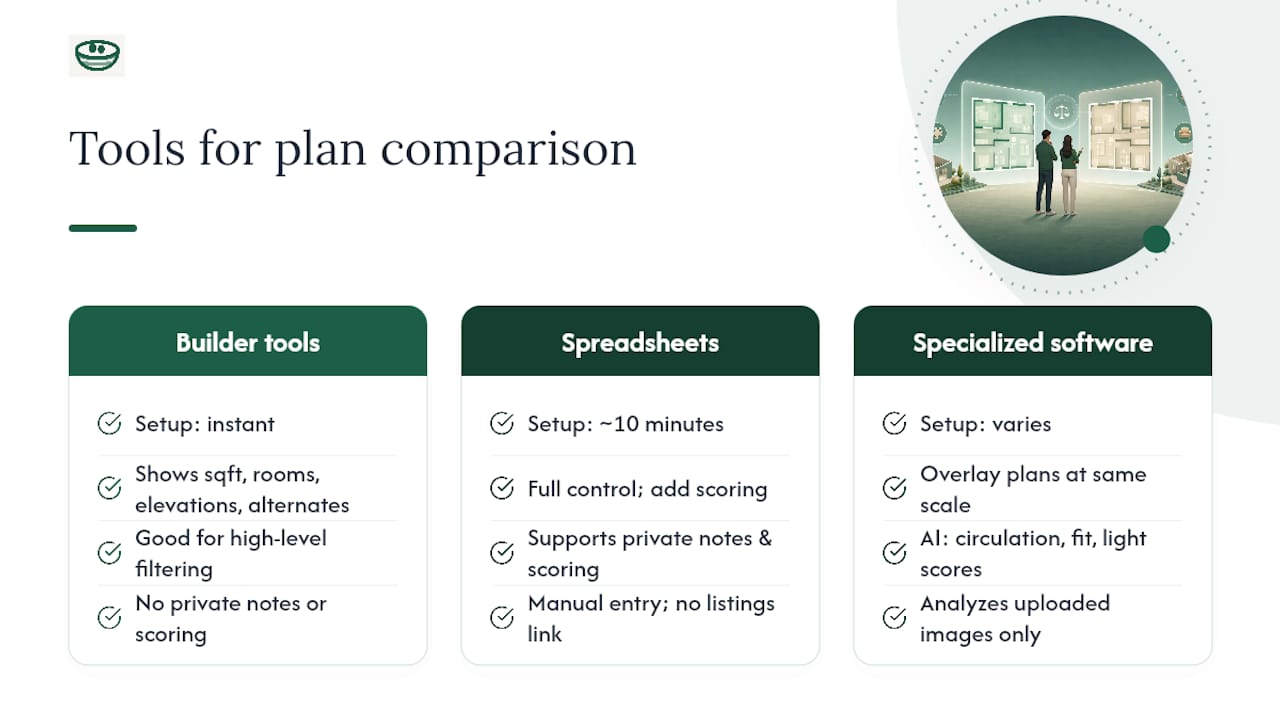
Builder compare tools are the fastest starting point. Most major builders offer an online compare feature that lists square footage, room counts, elevations, and available alternates side by side. They're good for high-level filtering but typically don't support private notes, custom scoring, or collaborative annotations. What you see is what the builder wants you to see.
Spreadsheets give you full control. Copy the column headers from Section 2 into Google Sheets or Excel, add a scoring formula, and you have a working comparison tool in about 10 minutes. The limitation is manual data entry and no connection to listing sources. A house hunting spreadsheet template with pre-built scoring columns cuts setup time considerably.
Specialized floor-plan software (tools like RoomSketcher or Floorplanner) lets you overlay two plans at the same scale, which exposes which layout actually offers more usable space even when listed square footage is identical. AI-based analyzers can surface circulation scores, furniture-fit ratings, and natural-light estimates quickly, but they only analyze what's visible in the uploaded image. They won't catch a missing permit detail or a structural wall that isn't labeled.
The buyers who make the clearest decisions are the ones who separate the comparison workspace from the browsing workspace. Builder sites are for discovery. Your private comparison tool is where you score, annotate, and decide. Mixing the two means your notes live on a platform the seller controls.
Plan catalogs often indicate which plans are semi-custom vs. fully custom and list available alternates. Checking that column early prevents you from falling in love with a plan that can't be modified to meet your needs.
Pro Tip: When using a builder's compare tool, screenshot the side-by-side view and paste it into your private notes alongside your own scoring. You get the builder's data and your own analysis in one place.
What red flags should you watch for in a floor plan?
Some layout problems are cheap to fix. Others will cost you more than you'd expect.
Common red flags:
- Dead-end corridors that serve only one room create bottlenecks and feel cramped. In a multi-story plan, a corridor that dead-ends at the master suite also means every trip to that room is a one-way walk.
- Conflicting door swings happen when two doors open into the same space. It's a minor annoyance in a bathroom; it's a daily frustration in a laundry room or pantry.
- Windowless rooms (beyond bathrooms and closets) reduce natural light and ventilation and can create code compliance issues depending on your jurisdiction.
- Missing or undersized storage is one of the most common complaints from buyers a year after move-in. Count closets, check pantry depth (24" minimum for useful shelving), and locate the utility room.
- Poor stack on multi-story plans: bathrooms, kitchens, and laundry should stack vertically to share plumbing chases. A plan where the second-floor bathroom sits above the living room means a long, expensive plumbing run.
Modification cost tiers to keep in mind:
Cheap fixes include reorienting a door swing, adding a closet in a non-structural wall, or swapping a window size. These are typically cosmetic or framing-only changes.
Expensive changes include relocating a bathroom (plumbing rough-in moves), shifting the stair core (structural), adding a window in a load-bearing wall (header engineering), or changing the roofline to add a dormer. These can run into tens of thousands of dollars on a custom build.
Open vs. closed layouts each carry trade-offs: open plans feel spacious but reduce acoustic privacy and limit furniture placement options. Measure the circulation zone in an open plan to confirm it doesn't eat the square footage you thought you were getting.
How do you confirm a plan will feel right before you commit?
Paper decisions need real-world validation. Two methods work consistently well.
-
Tape mockup. Use painter's tape on your current floor (or an empty garage) to mark the footprint of the key rooms: the living room, kitchen island, and master bedroom. Walk through the taped outline. A 12' × 14' living room feels very different from a 16' × 20' one, and tape costs nothing.
-
Furniture footprint test. Cut paper rectangles to scale (at 1/4" = 1'-0", a queen bed is 1.25" × 1.67" on paper). Place them on a printed plan. If the bedroom can't fit the bed, two nightstands, and a dresser with 24" clearance on the sides and foot, it's a small room regardless of what the square footage says.
-
Model home visit checklist. Bring your comparison table. Measure the actual door clearances, check sightlines from the kitchen to the living area and backyard, open every door fully and note conflicts, and stand in the master bedroom and listen for noise from the street or garage. These are the details a 2D drawing can't tell you.
-
Sightline trace. Stand at the front door (or the kitchen sink) and draw a line of sight on the plan. What can you see from that point? Privacy between the entry and the master bedroom matters more than buyers realize until they've lived in a plan without it.
-
Contractor or architect review. If you're remodeling or building custom, bring the shortlisted plan to a contractor before you finalize. A 30-minute feasibility conversation can surface structural constraints that would cost significantly more to address after the contract is signed.
An open house tracker helps you log these on-site observations systematically so nothing gets forgotten between visits.
Copyable comparison table template
Use this template as a starting point. Add or remove rows to match your shortlist.
Scoring instructions: List your must-haves (non-negotiable features) and nice-to-haves separately before you start. For each plan, award 2 points per must-have met, 1 point per nice-to-have met, and subtract 2 points per red flag. Sum the rows. A plan with a high score but one catastrophic red flag (like an impossible bathroom stack) should still be reconsidered; the score is a guide, not a verdict.
Export the table as a PDF or share it as a Google Sheet before any decision meeting. A side-by-side house comparison checklist can supplement this template with additional criteria for the full property (not just the floor plan).
The habit that actually saves time and prevents regret
Most buyers treat the comparison as a one-time event. They tour three model homes, collect brochures, and then try to reconstruct their impressions a week later from memory and blurry phone photos. By that point, Plan B and Plan C have merged into one vague recollection.
The habit that prevents this: annotate one plan immediately after each viewing, before you get back in the car. Three items only: the single best thing about the layout, the single biggest concern, and one dimension you want to verify. That's 90 seconds of work that makes every subsequent comparison sharper.
The other thing most buyers overlook: window orientation relative to primary living spaces. A plan with a west-facing kitchen gets brutal afternoon sun in summer. A master bedroom facing east wakes you up at 6 AM. These aren't deal-breakers for everyone, but they're the kind of detail that disappears in a comparison table unless you explicitly check the north arrow and map each room's exposure. Check it on paper first, then confirm it on site.
Nestnoted keeps your floor plan comparisons private and organized
Spreadsheets work until you're managing five plans, two agents, and a partner who has different priorities. That's where things get messy.
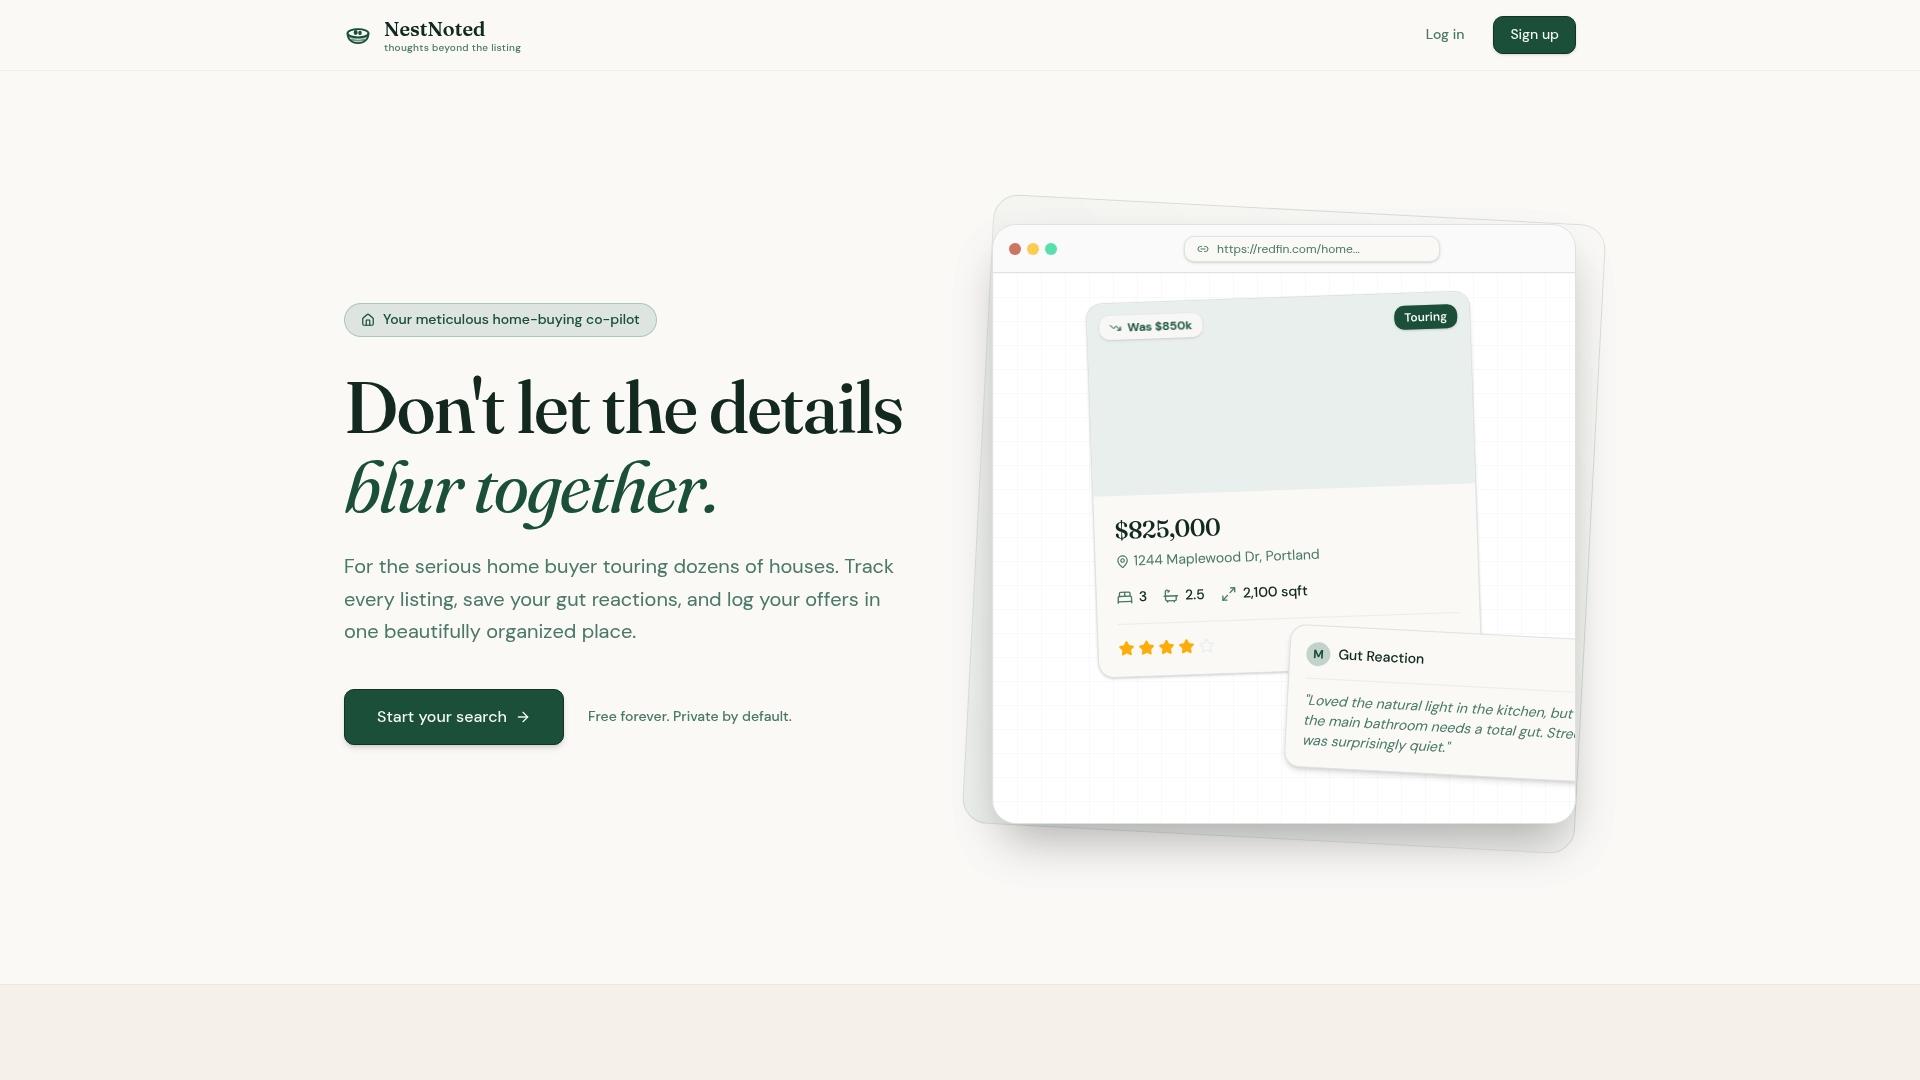
Nestnoted is built for exactly this stage of the buying process. You get a private workspace to save listings, attach annotated floor plans, log pros and cons, and score each property against your own criteria — all without your notes being visible to sellers, agents, or anyone else. The listing import feature pulls data from major platforms so you're not re-entering square footage and room counts by hand. The notes and ratings system keeps every annotation tied to the right property, and the comparison view lets you put plans side by side with your own scoring visible.
- Save and annotate floor plans privately, with no seller visibility
- Score plans against your must-haves using structured pros/cons
- Import listing data directly rather than entering specs manually
- Share your comparison workspace with a partner or agent
- Export a printable comparison before model-home visits
Start your free Nestnoted account and bring your comparison table to your next viewing.
Sources
- How to Read a Floor Plan: Symbols & Scale | MeasureFloorPlan
- How to Read a Floor Plan: Complete Guide | RoomSketch3D | RoomSketch3D
- How to Read a Floor Plan: Symbols & Scale | Ataman Studio
- How to Read a Floor Plan Before You Build | RBA Home Plans
- Are Open Floor Plans Going Out of Style? | One Day Doors & Closets