

Use a private, digital home-buying checklist from day one: get pre-approved, pull a property template into a private tracker, and add your first active listing before you tour anything.
Start here:
- Get mortgage pre-approval now. Letters typically last 60–90 days, so time it to your search window.
- Import a property checklist template into a private digital tracker and add one active listing.
- Schedule your first three tours and bring a per-showing checklist to each.
Two things to keep in mind before you go further: the full buying process typically runs 4–7 months, with closing alone taking 30–45 days after an accepted offer. And the CFPB warns that wire-fraud scams commonly target buyers near closing, so never wire funds without first calling the title company on a number you looked up yourself.
Table of Contents
- What does the best home buying checklist look like, step by step?
- What should you record for every property you tour?
- Why does a private digital tracker beat a spreadsheet for serious buyers?
- How do you protect your funds on closing day?
- How do you run this checklist inside Nestnoted?
- Spreadsheets vs. dedicated trackers: which one fits your search?
- What does pre-approval and budgeting actually require?
- What happens during inspection and due diligence?
- Which documents do you need to collect and track?
- How do you customize the checklist for your market and situation?
- Key Takeaways
- Why private tracking changes outcomes for serious buyers
- Your private checklist is ready to use in Nestnoted
- Authoritative sources and further reading
What does the best home buying checklist look like, step by step?
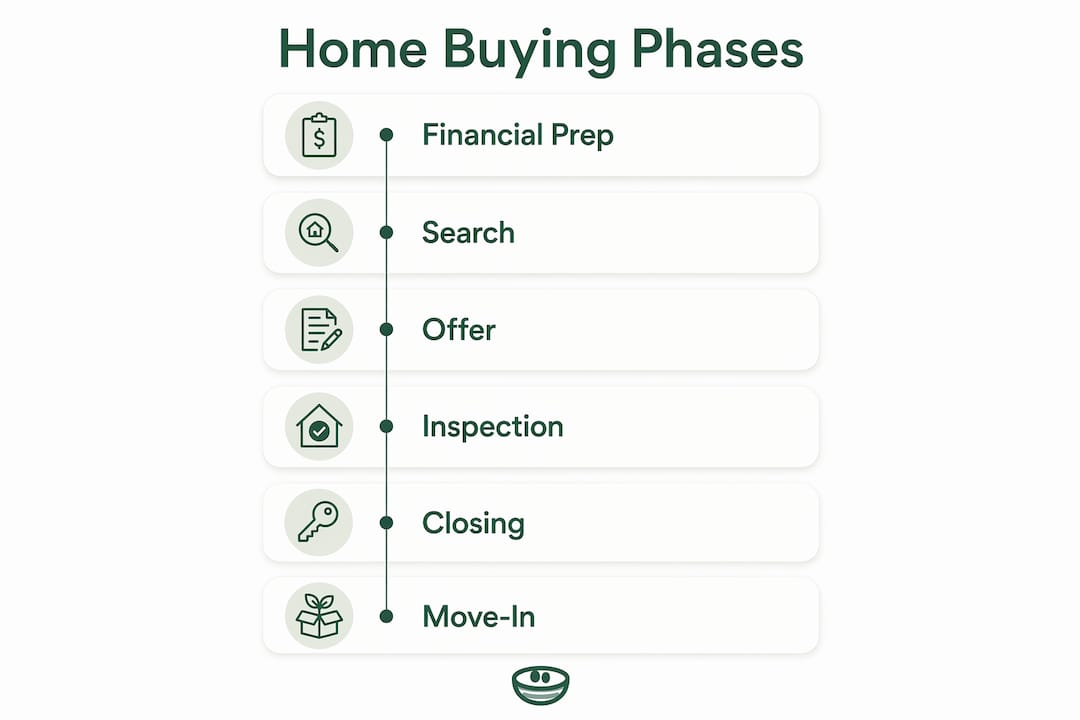
The process breaks cleanly into six phases. Each has a time window and a cash reality check.

| Phase | Typical Duration | Estimated Cash Outlay |
|---|---|---|
| Financial prep | 60–90 days before search | Credit repair costs; savings target set |
| Pre-approval | 1–2 weeks | $0–$300 application fees |
| Agent + search | 4–7 months | $0 (agent paid at closing) |
| Offer + due diligence | 7–14 days inspection window | $300–$600 inspection; earnest money |
| Closing | 30–45 days post-accepted offer | Down payment + 2–6% closing costs |
| Move-in | Week of closing | — |
Plan for roughly 5–10% of the purchase price in upfront cash covering your down payment, closing costs, and reserves. First-time buyers often put down around 8% rather than the traditional 20%, so model a few scenarios before locking in a savings target.
At every showing, run a quick mental checklist: note the floor plan flow, ceiling and wall condition, water pressure, natural light, storage, and anything that smells off. Memory blurs after the third home, so write notes immediately after you leave, not the next morning.
What should you record for every property you tour?
Copy this template into your tracker before your first showing. Fill it out within an hour of leaving.
Listing basics
- Address, MLS number, list price, days on market
- Beds / baths / square footage / lot size
- Year built, HOA (yes/no), HOA fee per month
Financials
- Estimated PITI (principal, interest, taxes, insurance)
- HOA rules summary (not just the fee — check pet limits, rental restrictions, and parking rules)
- Utility delivery: gas vs. electric heat, well vs. municipal water
Condition items
- Roof age and visible condition
- HVAC age and last service date
- Foundation, basement, or crawl space observations
- Electrical panel type (flag Federal Pacific or Zinsco panels)
- Visible water damage or staining
Comps and red flags
- Two or three recent comparable sales within half a mile
- Estimated repair costs for flagged items
- Neighborhood notes (traffic, noise, proximity to amenities)
Quick pros/cons and score (1–10)
Example entry for 412 Maple Drive: List price $389,000 / 3bd 2ba / 1,640 sq ft / built 1998 / HOA $210/mo (no rentals allowed). Roof replaced 2019. HVAC original — budget $6,000–$8,000. Basement dry. Score: 7/10. Pro: large yard, good school district. Con: HOA rental restriction kills exit flexibility.
That rental-restriction note is exactly the kind of detail that disappears from memory by the time you're comparing three finalists.
Why does a private digital tracker beat a spreadsheet for serious buyers?
Buying a home involves roughly 200 decisions. A private digital tracker reduces decision fatigue by preserving your candid, unfiltered impressions right after a tour, before social pressure or a seller's agent's enthusiasm reshapes your memory.
Must-have features to look for in any dedicated tracker:
- Secure document storage for inspection reports, disclosures, and closing docs
- Side-by-side property comparison across custom fields
- Pipeline stages (interest → toured → offer pending → closed) with deadline reminders
- MLS/Zillow/Redfin sync so you import listings rather than re-entering data manually
- Private-by-default notes so candid scores stay between you and your agent
Zillow and Redfin are useful for finding listings, but neither is built for private, structured comparison across properties you've actually toured. A dedicated tracker fills that gap.
Pro Tip: Structure your post-tour note as five fixed fields every time: overall score (1–10), best feature, biggest concern, estimated repair cost, and gut reaction. Consistency across 15 properties makes side-by-side comparison take minutes instead of hours.
How do you protect your funds on closing day?
Wire fraud is the most financially devastating mistake a buyer can make, and it happens at the worst possible moment.
Follow this sequence before wiring a single dollar:
- 48–72 hours before closing: Call the title company using a number from their official website. Confirm the wire amount, receiving bank, account number, and routing number.
- Morning of closing: Call again to re-confirm. Wire-fraud attackers sometimes intercept email threads days before closing and swap account numbers at the last minute.
- After wiring: Call the title company a third time to confirm receipt before you leave for the closing table.
- Save these numbers in your phone now: title company, your lender's closing department, and your real estate agent.
The CFPB's TRID rule also requires your lender to deliver the Closing Disclosure at least three business days before closing. Use that window to compare it line by line against your original Loan Estimate. Any fee that changed significantly is worth a phone call before you sign. For a deeper look at closing-day preparation, this three-day window is your last real leverage point.
Store all closing documents in a secure, private location, not a shared Google Drive folder.
How do you run this checklist inside Nestnoted?
You can import the property template above and be tracking your first listing in under 15 minutes.
Setup steps:
- Create a private workspace and verify that sharing is set to "private" before inviting your agent.
- Import the sample property template (fields from the section above) as your default record.
- Add your first toured property, attach any listing photos or disclosures, and fill in the condition fields.
- Tag it with a pipeline stage: Interest, Toured, Offer Pending, or Closed.
- As you add more properties, use the side-by-side comparison view to rank finalists.
- Store inspection reports and the Closing Disclosure in the secure document section, not in email.
Pro Tip: Before you invite a collaborator (agent, partner, co-buyer), check the workspace sharing settings. Nestnoted keeps notes private by default, but a shared workspace makes all attached notes visible to invitees — decide what you want them to see before you send the invite.
Spreadsheets vs. dedicated trackers: which one fits your search?
Spreadsheets work fine for the first two or three properties. They break down fast once you're juggling six listings, two pending offers, and a stack of inspection reports.
Spreadsheets
- Free and familiar
- No sync with MLS sources; manual data entry every time
- No pipeline stages or deadline reminders
- Documents stored separately, easy to lose
Generic notes apps
- Quick for raw impressions
- No structured fields; comparisons require manual reformatting
- No document storage or sharing controls
Dedicated private trackers
- MLS/Zillow/Redfin sync cuts data entry
- Built-in pipeline stages prevent missed contingency deadlines
- Side-by-side comparison works across custom fields
- Private-by-default notes protect candid impressions
- Secure document storage keeps everything in one place
If your search involves more than five properties, multiple offer rounds, or a co-buyer, a dedicated tracker pays for itself in avoided mistakes alone. A step-by-step approach consistently helps buyers avoid the two most common errors: skipping pre-approval and underestimating closing costs.
What does pre-approval and budgeting actually require?
Pre-approval is not optional. Sellers in competitive markets routinely ignore offers without a letter, and the letter itself tells you what you can actually afford, not what a calculator estimates.
Most conventional mortgages require a 620 credit score minimum, but a score above 740 typically unlocks meaningfully better rates. Shop multiple lenders within a 14-day window so the credit pulls count as a single inquiry. Closing costs run 2–6% of the loan amount on top of your down payment, and lender fees alone can include origination fees (0.5–1.5% of the loan), underwriting fees, and appraisal costs. Budget all of it before you fall in love with a listing. Modeling 5% vs. 10% down scenarios inside your tracker gives a concrete view of monthly PITI differences and often reveals that the "stretch" purchase is less affordable than it looks.
What happens during inspection and due diligence?
The inspection contingency window typically runs 7–14 days after an accepted offer. Use every day of it.
A general home inspection costs roughly $300–$600 and covers structure, roof, HVAC, plumbing, and electrical. It does not cover pests, radon, mold, or sewer lines — those are separate specialty inspections, each worth ordering if the property or region warrants it. Review the HOA's CC&Rs (not just the fee) before the contingency expires; rental restrictions, pet rules, and upcoming special assessments can change the math on a property entirely. The title search, run by the title company, confirms clean ownership and surfaces any liens or easements. If the title search turns up an unresolved lien, do not close until it is cleared in writing. For a practical guide on avoiding common buyer mistakes during this phase, the due-diligence window is where most of them happen.
Which documents do you need to collect and track?
Lenders dig into roughly two years of financial history. Gather these before you apply for pre-approval:
- Identity: government-issued ID, Social Security number
- Income: two years of W-2s or 1099s, two most recent pay stubs, two years of tax returns
- Assets: two to three months of bank and investment account statements
- Debts: current statements for all open loans and credit cards
After an offer is accepted, add these to your tracker:
- Seller's disclosure statement
- HOA documents (budget, meeting minutes, CC&Rs)
- Inspection report and any specialty inspection reports
- Appraisal report
- Loan Estimate and Closing Disclosure (compare them line by line)
- Title commitment and final title insurance policy
Keep every document in a single secure location. Emailing PDFs back and forth creates version confusion and security risk.
How do you customize the checklist for your market and situation?
A generic checklist is a starting point, not a finish line. Adjust it before your first tour.
In high-competition markets (low inventory, multiple offers common), add a field for "days on market at offer" and "number of competing offers" to calibrate your bidding strategy over time. In flood-prone or wildfire-risk areas, add fields for FEMA flood zone designation and insurance cost estimates, since homeowner's insurance in some regions now exceeds $6,000 per year. If you're buying a condo, replace the lot and exterior fields with HOA financial health indicators: reserve fund balance, pending litigation, and deferred maintenance. First-time buyers should also add a "first-time buyer program eligibility" field and check HUD's state-by-state counselor database before assuming they need a full 20% down.
The HUD home-shopping checklist is a solid baseline for physical property fields. Customize from there based on your property type, climate, and local market dynamics.
Key Takeaways
A private, digital home-buying checklist covering all six phases, from financial prep through move-in, is the single most effective tool for serious buyers managing multiple properties and a tight timeline.
| Point | Details |
|---|---|
| Start with pre-approval | Letters last 60–90 days; shop multiple lenders within a 14-day window to protect your credit score. |
| Budget 5–10% upfront | Plan for down payment, closing costs (2–6%), and reserves before you tour a single property. |
| Record every property consistently | Use a fixed template with condition, financials, comps, and a 1–10 score immediately after each showing. |
| Verify wire instructions twice | Call the title company on a number you look up yourself, 48–72 hours before closing and again on wiring day. |
| Track a pipeline, not a list | Stage properties (interest → toured → offer pending → closed) to catch contingency deadlines before they expire. |
| Use Nestnoted for private tracking | Nestnoted centralizes listings, private notes, side-by-side comparisons, and secure documents in one private workspace. |
Why private tracking changes outcomes for serious buyers
Most buyers treat their home search like a browsing session. They screenshot listings, text notes to themselves, and try to reconstruct their impressions two weeks later when they're ready to make an offer. By then, the details that actually mattered — the water stain on the basement ceiling, the HOA rental restriction, the HVAC that was clearly on its last legs — have blurred into a vague feeling.
What I've seen consistently is that buyers who document candid, structured impressions immediately after tours make sharper offers and negotiate repairs with more precision. They're not guessing at what they noticed; they have a record. That record also changes the dynamic with their agent, because the conversation shifts from "what did you think?" to "here's what I scored and why." Fewer second-guesses, fewer regrets, and a cleaner path through due diligence. Nestnoted is built for exactly this workflow, and the privacy-by-default design matters more than most buyers realize until they've written something honest about a property and then remembered that their notes were visible to everyone in a shared spreadsheet.
Your private checklist is ready to use in Nestnoted
Nestnoted gives serious buyers a private workspace to track every listing, compare properties side by side, sync from Zillow and Redfin, and store inspection and closing documents securely — all with notes that stay private by default.
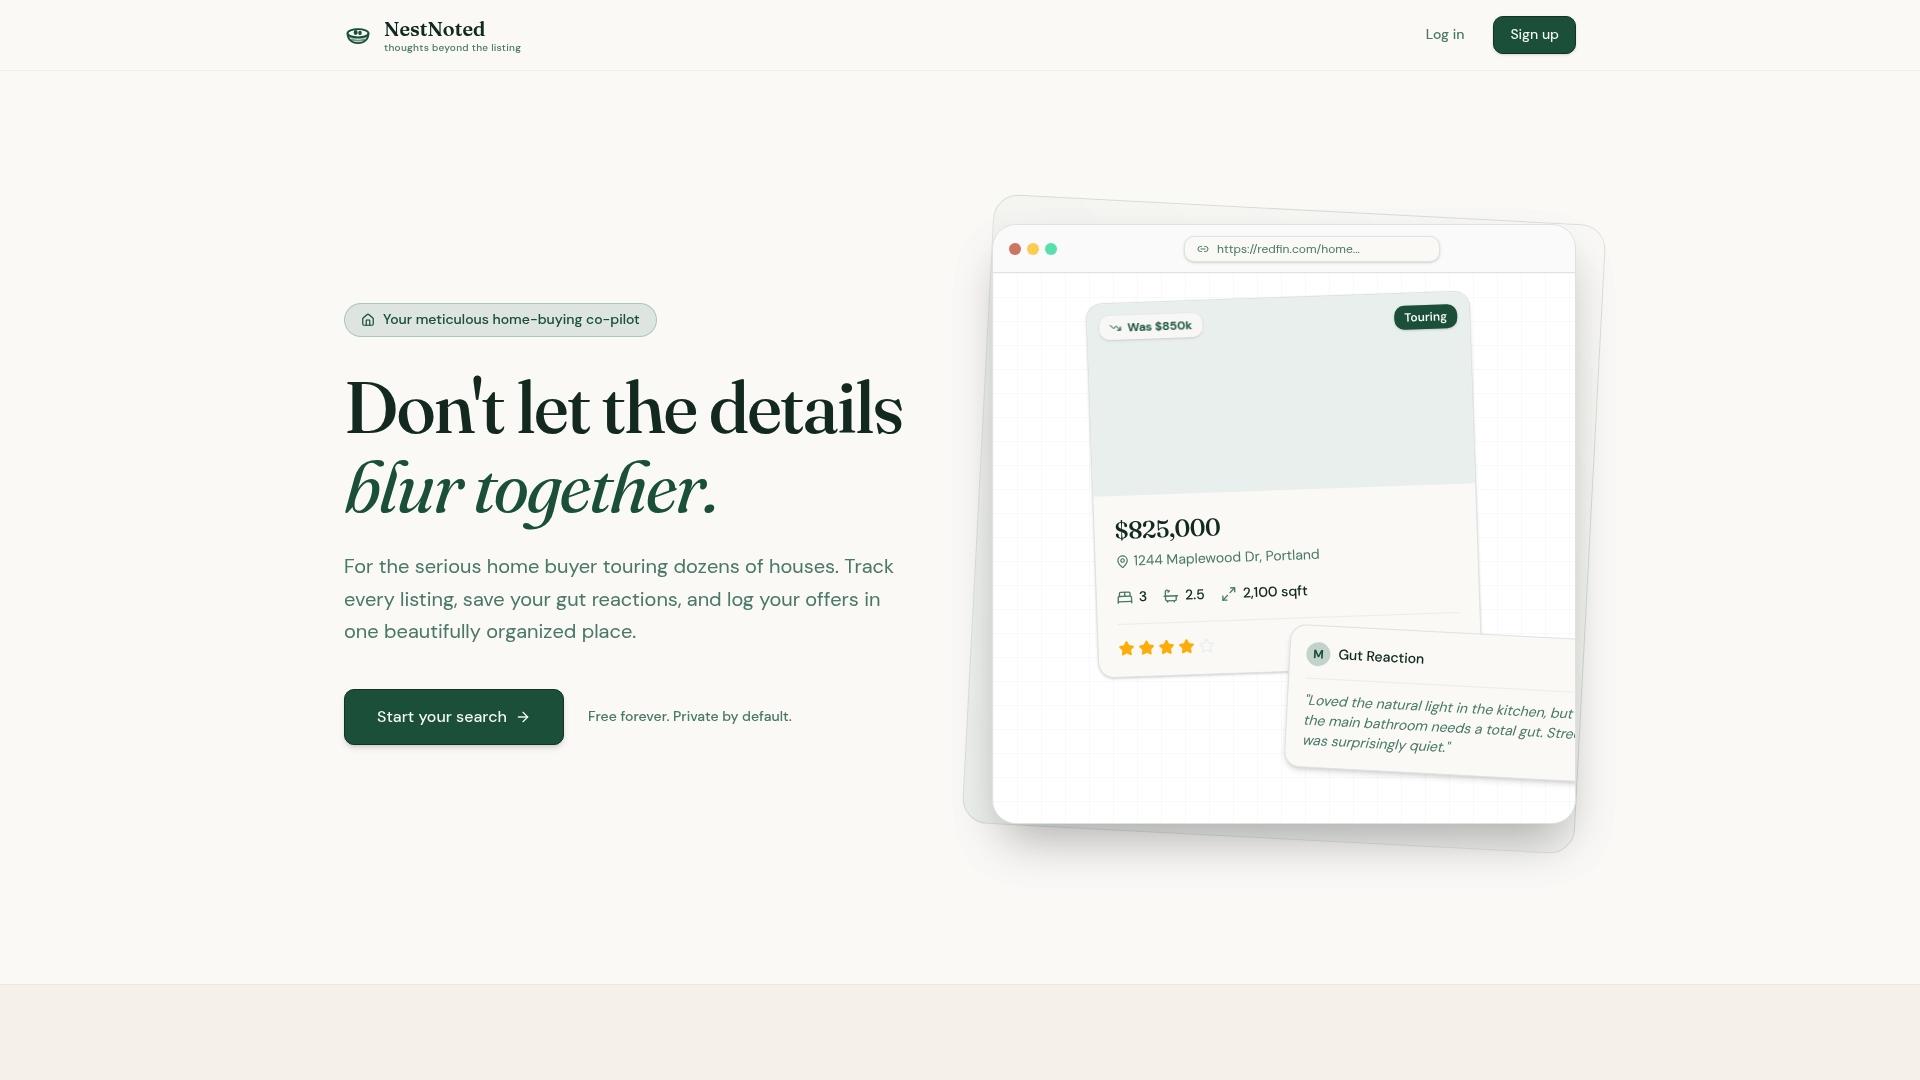
Every feature covered in this checklist, pipeline stages, custom property fields, secure document storage, and MLS sync, is available free with an account. No spreadsheet juggling, no lost notes, no shared Google Doc that your agent can read.
Create your free Nestnoted account and add your first property today. Import the template from this article, tag your active listings, and start comparing with a clear head.
Authoritative sources and further reading
- CFPB: Buying a House — Best for wire-fraud guidance, TRID closing disclosure rules, and the Home Loan Toolkit.
- HUD: Buying a Home — Best for state homebuying programs, FHA loan options, and HUD-approved housing counselors.
- HUD Home-Shopping Checklist (PDF) — A printable per-property tour checklist covering physical condition and neighborhood factors.
- Opendoor: Home Buying Checklist — Best for step-by-step timeline, cost benchmarks, and phase-by-phase guidance.
- AskDoss: Home Buying Checklist — Best for inspection timing, contingency windows, and per-showing observation prompts.
- Credible: How to Buy a House — Best for mortgage comparison, pre-approval steps, and common buyer mistakes.
This article is general information, not legal, financial, or real estate advice. Confirm current rules, rates, and programs with the CFPB, HUD, your state housing agency, or a licensed professional for your specific situation.